Scheduling
This is for your servicing/maintenance schedules and will look just like your Wall Planner - once created you can leave it alone and only edit if you move/end/replace vehicles
To create a schedule – the scheduling system reads existing data from the system unlike a traditional wall planner of ticking and sticky dots the electronic version reads the actual data and reacts/plans accordingly with the data inputted.
Before you start scheduling you need to ensure you have the correct template to undertake the check required against that template or to drag in the paper document and tag to the same template.
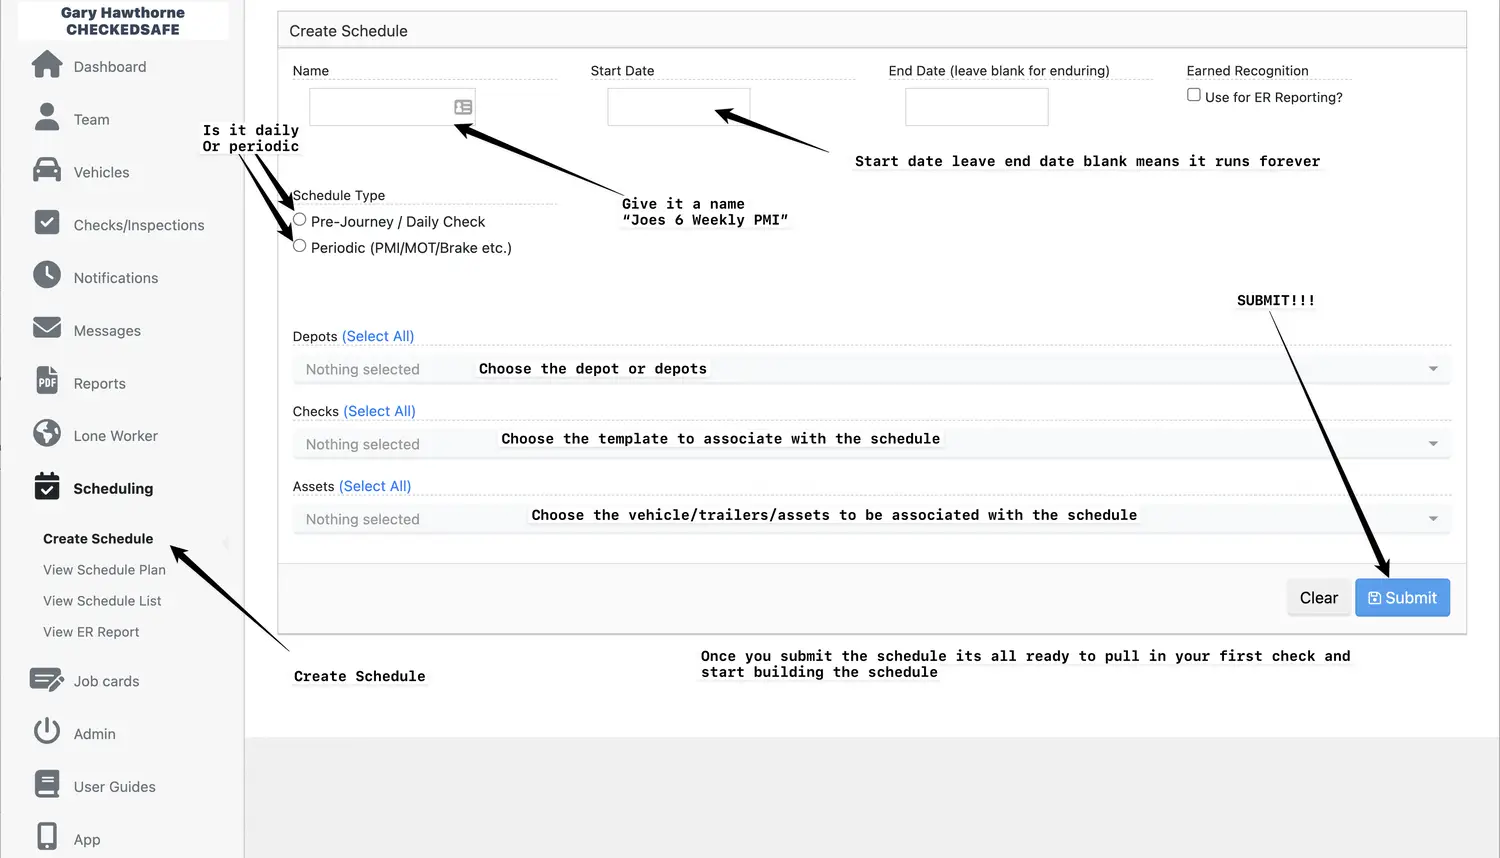
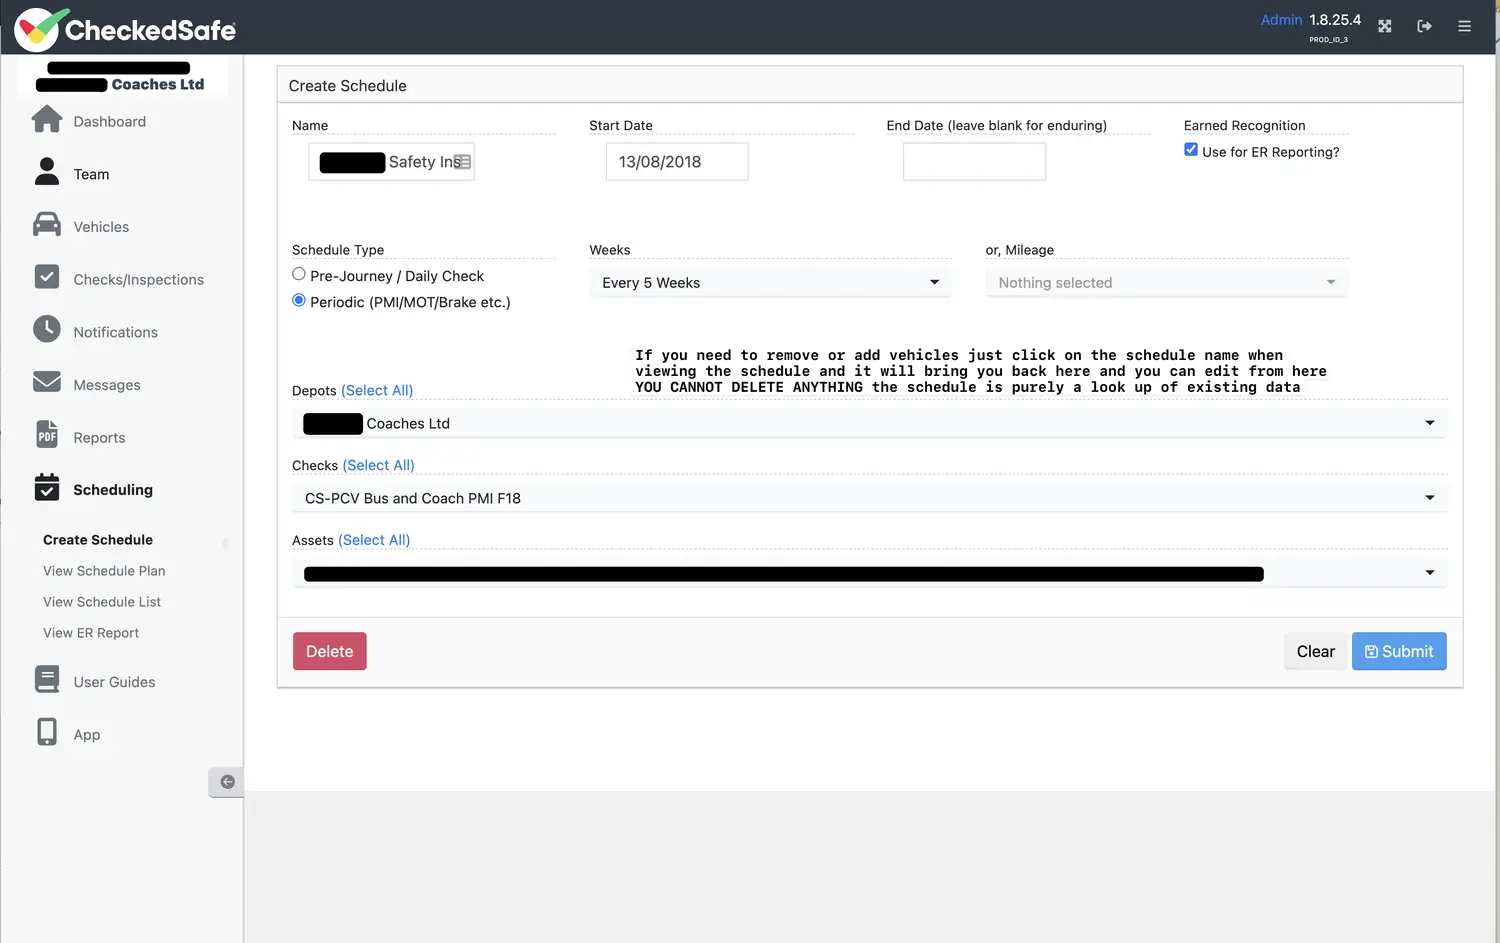
Once the schedule is set up any data in the system that is “tagged” to the schedule will pull into the schedule read view.
If you move a vehicle from depot to depot all data will move with it BUT NOT any schedule settings so you need to go into the schedule settings and remove the vehicle from the old schedule and add the vehicle to the new schedule, you will also need to set the pre planned dates if you use them (Blue Dots) as you are moving the vehicle to a new schedule so it will not know what its schedule will be.
For Hours/Mileage schedules they all default to weekly on the set up so if you have tagged at 1000 mile/1000 hour inspection/service it will also look at the average hours/mileage and plot accordingly as well as notyfing you
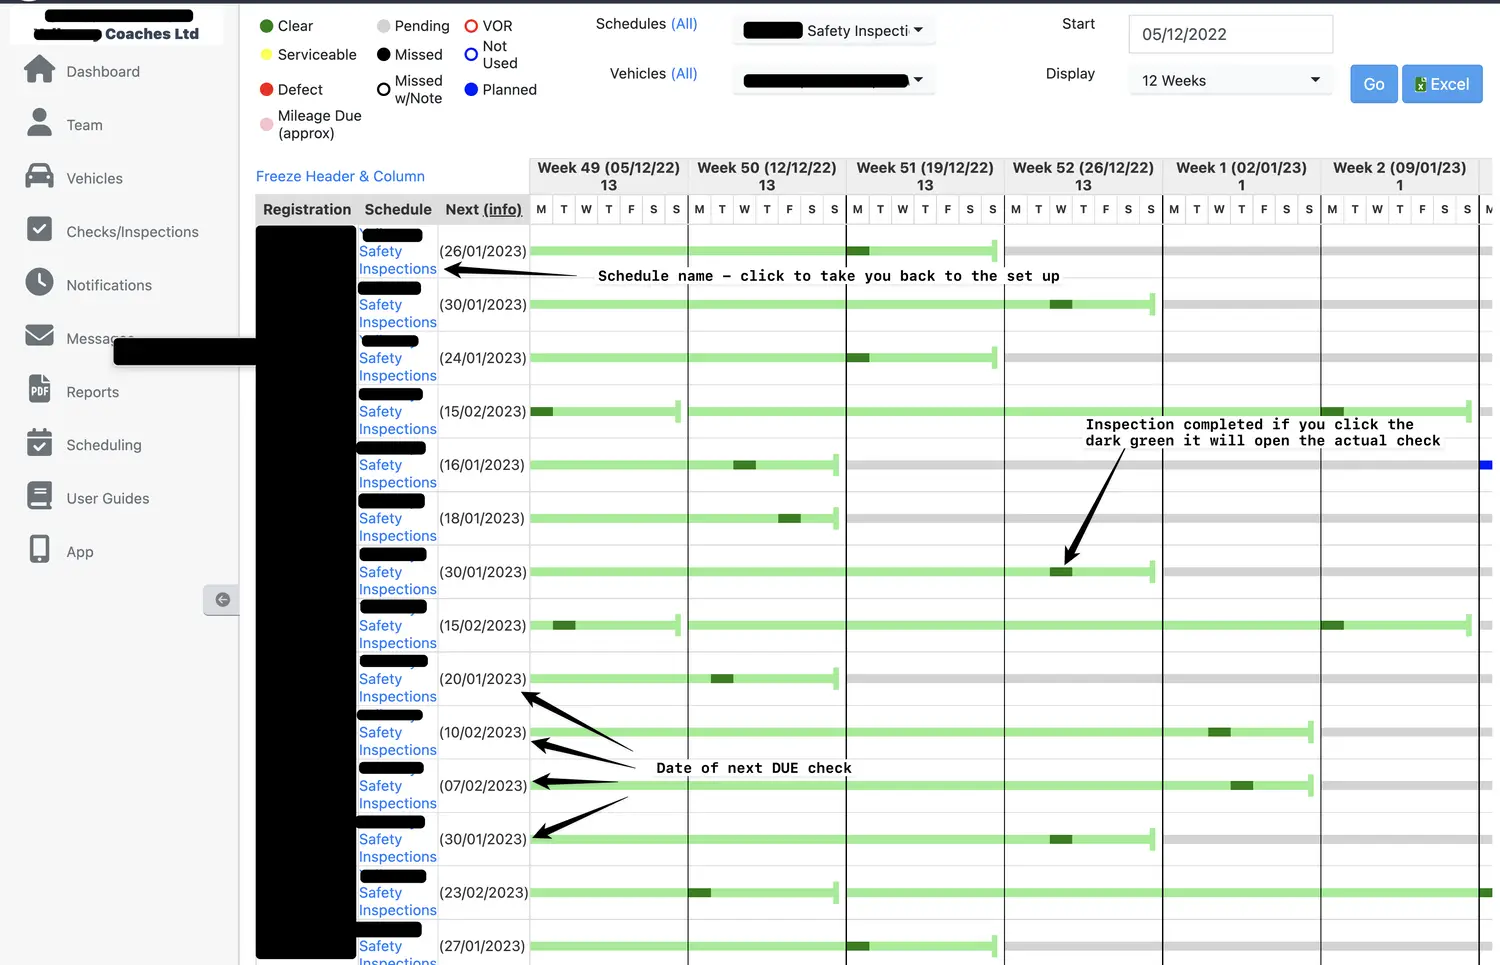
To view the schedule, you can do this by clicking View Schedule plan under Scheduling and if you wish to see the individual assets listed in the schedules again by clicking the view Schedule list it will bring up the list to view.
The following screenshots provides more information on schedules
To view the schedule after clicking View Schedule plan
Use dropdown to pick the schedule
Use dropdown to pick the vehicles to view (or click all as it will only drag in those vehicles you have set up in the schedule


Pick the start date

Once you have picked the start date press go – you can run this off as a printout so you can still have the traditional wall planner.
The schedules you set up on day one will look odd as they will all be the same periods, but you will soon see as data is pulled into the schedule electronically the periods will start to auto calculate forward and once you have your first data point loaded to can then plan to the day your next inspection, once completed again it will auto calculate forward